
Download direct : link
http://www.adrive.com/public/afdc825c1d490a02def09539c48810524cf1a02de52f59cd451198f811d37331.html
Make Your Windows Genuine - For XP,Server 2003, Vista - By iNGEn
Download Router Sim Network Visualizer v6 [Download, Includes New Exercises]

Download Router Sim Network Visualizer v6 [Download, Includes New Exercises]
Direct Download:
http://digiex.net/attachments/applications/742d1225721945-router-sim-network-visualizer-v6-download-includes-exercises-routersimnetworkvisualizer-v6.0.rar
Usefull Command-line Guide in Wink2 & Wink23 Server
shutdown /m \\
shutdown /m \\
shutdown \\
shutdown \\
All three of the following commands display the system uptime
psinfo \\
srvinfo \\
systeminfo /s
runas /user:administrator@rallencorp.com /netonly "mmc.exe" - Sometimes it is convenient to create a MMC console that runs under administrator privileges. In this case, simply use mmc.exe as the command to run from runas:
netsh int ip show config - view network configuration information is netsh
netsh int ip set address name="Local Area Connection" source=static 10.3.53.3 255.255.255.0 10.3.53.1 1 - This example configures a static IP address for "Local Area Connection":
netsh int ip show dns - view the current DNS configuration for all connections on the local machine
nltest /server:
linkspeed /s \\
linkspeed /s
linkspeed /dc - Alternatively, you can specify the /dc switch to have it test the machine's current domain controller
netsh interface ipv6 install - The following command installs the IPv6 stack. It must be run directly on the target server
psexec \\server01 netsh interface ipv6 install - If you need to run the command remotely, you can use the psexec
secedit /refreshpolicy machine_policy - You can force new auditing settings to be applied by running the secedit command on Windows 2000
gpupdate /target:computer - the gpupdate command on Windows Server 2003
cusrmgr -m \\
For example:
cusrmgr -m \\srv01 -u admininstrator -r admn
iisreset - The following command restarts all IIS services on the computer
iisreset 172.16.12.5 /stop - To stop IIS services on a remote computer with IP address 172.16.12.5
iisreset 172.16.12.5 /status - To verify that IIS services have been stopped on the remote computer
iisreset /disable - To prevent iisreset from being used to stop IIS services,
iisreset /stop - stop all IIS services
net stop w3svc - To stop the WWW service only on your IIS computer
net start w3svc - To start it again
net stop /y iisadmin - To stop the IISAdmin service and all dependent IIS services
iisweb /stop "Default Web Site" - To stop the Default Web Site only while leaving other web sites running
iisweb /start "Default Web Site" - To start it again
iisweb /create D:\HR "Human Resources" /i 216.44.65.8 - The following command creates a new web site named Human Resources on server with IP 216.44.65.8 and root directory D:\HR
iisweb /create D:\Corp "My Company" - The following command creates a new site named My Company with root directory D:\Corp and IP address "All Unassigned,"
iisvdir /create "Human Resources" employees D:\resumes - The following command creates a virtual directory within the Human Resources web site and maps alias employees to physical directory D:\resumes:
iisvdir /query "Human Resources" - list virtual directories within the Human Resources site:
iisvdir /delete "Human Resources\employees" - To delete the previously created virtual directory
iisback /backup /b 28july04 - The following command backs up the metabase using the iisback.vbs script and names the two backup files 28july04.MD0
iisback /list - To view a list of the current metabase backups
iisapp - The following command displays the process ID (PID) of all worker processes running on the computer,
iisapp /p 2765 - The following command displays the application pool to which the worker process having PID 2765 is assigned
iisftp /create C:\ftpstuff "My FTP Site" /i 172.16.12.50 /dontstart - The following command creates a new FTP site named My FTP Site with root directory C:\ftpstuff and IP address 172.16.12.50
iisftp /start "My FTP Site" - To start the new site,
iisftp /query - To display a list of all FTP sites on your server
net stop msftpsvc - You can also stop and start all FTP sites on your server using the following commands
net start msftpsvc
net stop dns - You can use the net.exe command to stop or start the DNS Server service on the local machine
net start dns
dnscmd
dnscmd
dnscmd
unlock . * -view - unlock that lets you find locked out users and unlock them in one shot
unlock dc01 username - The following command unlocks the user rallen on dc01
dsmod user
dsmod user
dsmod group "
dsmod group "
dsmod user
dsget group "
dsget group "
dsadd computer "
netsh int ip set address name="
netsh int ip set address name="Local Area Connection" source=dhcp - configuring the connection named "Local Area Connection" to use DHCP
netsh int ip set address name="Local Area Connection" source=static 10.3.53.3 255.255.255.0 10.3.53.1 1 - This example configures a static IP address for "Local Area Connection
Run any of the following commands to start a service
psservice start
sc start
wmic service
net start
Run any of the following commands to stop a service
psservice stop
sc stop
wmic service
net stop
sc
sc \\
sc \\
psservice \\
taskkill -pid
taskkill /s
pskill \\
tasklist - viewing the running processes via the command line
pslist \\
top - There is also the top.exe command, which is available in the Windows 2000 Resource Kit. It provides a continually updated view of the top running process (by CPU)
tlist | findstr cmd.exe - On Windows 2000, you can use the tlist.exe (or pslist.exe) command in combination with findstr.exe to find processes
runas /user:
runas /user:AMER\rallen.adm "mmc.exe" -
diskpart - On Windows Server 2003, you can use the diskpart utility to view the disk, drive, and volume configuration. First, get into interactive mode
list disk - to view the list of disks
list vol - to see the list of volume and assigned drive letters,
nltest /server:
nltest /server:


change recycle bin name
change recycle bin name
1. Start, Run, 'Regedit'.
2. Press 'Ctrl'+'F' to open find box and type 'Recycle Bin' to search.
3. Change any value data with 'Recycle Bin' to whatever name you want to give it ( ie, like 'Trash Can' or 'Dump' etc).
4. Press F3 to continue searching for 'Recycle Bin' and change wherever you come across 'Recycle Bin' to new its new name.
5. Repeat step 4 until you have finished with searching and changed all values to its new name.
6. Close regedit and hit F5 on desktop to see the new name on screen.
Note: As a good practice, always backup your registry before changing anything although changing 'Recycle Bin' name is a simple tweak and doesnt affect anything else
Make your computer dual-boot Vista and XP
Step 1. In Vista, click Start, type diskmgmt.msc, and press Enter. Click Continue if prompted by User Account Control.
Step 2. Right-click a drive and choose Shrink Volume. Specify the amount to shrink, which in this case is the amount you want for your XP partition. At a minimum, you'll need around 2.5GB for XP Pro SP2. I suggest you select a larger partition to leave room for updates and other files that may need to be on the same drive as XP. Because I wanted a 5GB partition, I typed 5000 (representing 5,000 megabytes) in the available box. Click Shrink.
Step 3. Right-click the newly available area and choose New Simple Volume. Follow the steps in the wizard to assign a drive letter now, or wait until the next step. When prompted, check Perform a quick format to format the volume with NTFS.
Step 4. When the wizard is done formatting the new volume, you can assign or rearrange drive letters as needed. For example, changing drive letters may also put your CD/DVD drive in a more logical order.
To do that, right-click a volume or the CD/DVD drive and choose Change Drive Letters and Paths. If a volume hasn't got a drive letter yet, click Add. Otherwise, select the drive icon in the dialog box and click Change.
If you're rearranging the letters on existing drives, you may need to change the drives in a particular order. Or you may need to give a drive a temporary letter (such as Z) to free up a letter for another drive; you would change the Z drive to something else later. Make your selection and click OK. Repeat for other partitions or drives until you have the order you want.
Step 5. When you're done with your partitioning chores, exit Disk Management. Insert your XP disc into the drive and restart your system, booting from that disk.
Step 6. Follow the steps to install XP. When asked for the target drive, select your new partition and press Enter. Because you already formatted this partition with NTFS, you can skip the formatting step. At the appropriate screen, arrow down to Leave the current file system intact (no changes) and press Enter. Continue the installation process until it's finished and XP has started.
Step 7. Your system now boots to XP, so we'll need to do some fixing to set up a boot menu. Insert your Vista DVD and restart the computer from it. Click Next in the first screen.
Step 8. Don't click Install when prompted! Instead, click Repair Your Computer in the lower-left corner.
Step 9. When the System Recovery Options dialog appears, make sure Microsoft Windows Vista is selected and click Next. In the next dialog box, select the Command Prompt option at the bottom.
Step 10. In the command-prompt window, type the following commands and press Enter after each one:
bootrec.exe /fixMBR
bootrec.exe /fixBoot
Step 11. Close the command prompt and click Restart.
Step 12. When your computer has booted into Vista, click Start, type cmd.exe, and press Ctrl+Shift+Enter to make the command window open with elevated privileges. Click Continue, if prompted by User Account Control.
Step 13. Type the following commands in the command window, one at at time, pressing Enter after each one. After each command, you should get the response, "The operation completed successfully." A response of, "The specified entry already exists," is OK, too. If not, retype your command to make sure you've entered it correctly. If Vista is installed on a drive other than c:, change the first command below to use the proper drive letter. The curly braces around {ntldr} in each command must be typed exactly as shown:
bcdedit -set {ntldr} device partition=C:
bcdedit -set {ntldr} path \ntldr
bcdedit -displayorder {ntldr} -addlast
bcdedit -set {ntldr} description "Microsoft Windows XP"
That's it! The next time you restart your system, you should be see a prompt that will let you choose between Vista or XP. Select the one you want and press Enter.
Learn CCNA in 5 days

he Cisco CCNA network associate certification validates the ability to install, configure, operate, and troubleshoot medium-size routed and switched networks, including implementation and verification of connections to remote sites in a WAN. This new curriculum includes basic mitigation of security threats, introduction to wireless networking concepts and terminology, and performance-based skills. This new curriculum also includes (but is not limited to) the use of these protocols: IP, Enhanced Interior Gateway Routing Protocol (EIGRP), Serial Line Interface Protocol Frame Relay, Routing Information Protocol Version 2 (RIPv2),VLANs, Ethernet, access control lists (ACLs)
Download link
http://rapidshare.com/files/127259508/CCNA-Day1_Slides.rar
http://rapidshare.com/files/127259936/CCNA-Day2_slides.rar
http://rapidshare.com/files/127259816/CCNA-Day3_slides.rar
http://rapidshare.com/files/127260263/CCNA-Day4_slides.rar
http://rapidshare.com/files/127260170/CCNA-Day5_slides.rar
VMware Workstation 6.5.1 Build 126130

VMware Workstation description
Allows multiple operating systems to run on the same computer
VMware Workstation is a powerful virtual machine software for system administrators and developers who want to revolutionize software development, deployment and testing in their enterprise.
Shipping for more than five years and winner of over a dozen major product awards, VMware Workstation enables software developers to develop and test the most complex networked server-class applications running on Microsoft Windows, Linux or NetWare all on a single desktop.
Essential features such as virtual networking, live snapshots, drag and drop and shared folders, and PXE support make VMware Workstation the most powerful and indispensable tool for enterprise IT developers and system administrators.
While VMware does not provide technical support for evaluation users, registered customers of VMware Workstation receive 30 days of up-and-running technical support including access to our Online Support Request filing system.
Direct Link
Burn 800MB data to 700 MB CD
ometimes, due to some problems while ripping, rippers are not able to get the perfect "700 MB" Filesize, Which unables you to write the DivX/XviD file to a normal CD-R to enjoy it on your DivX player.
This guide will demonstrate, how we can successfully overcome this problem and write files of size up to 800 MB, into a normal 700 MB CD-R
How ?? : The idea is certainly fascinating. Despite DVD-R becoming more and more affordable regular CD-Rs are still the storage media of choice for most of us. As you may know, both VCD and SVCD can actually contain 800MB of movie data on a regular 700MB data disc. Why? Error correction is the keyword. Regular computer data CDs contain a lot of error protection, so your data won't get lost if you have some scratches on a CD. But the data on the CD itself has no error correction. If you start swapping bits in an executable file you have on a CD the file will no longer work. On the other hand, VCD and SVCD stream have some built-in protection so an additional protection on the data storage medium is no longer needed, which frees up space otherwise used for error correction. Those of you who have had a closer look at their burning program may have noticed that (S)VCDs are burned in mode2 whereas regular data CDs are burned in mode1.
Lets Begin the Fun
We'll need the following software
Mode 2 GUI maker
only10 mb
Download
Microsoft Malicious Software Removal Tool 2.4

The Microsoft Windows Malicious Software Removal Tool checks Windows XP, Windows 2000, and Windows Server 2003 computers for and helps remove infections by specific, prevalent malicious software—including Blaster, Sasser, and Mydoom. When the detection and removal process is complete, the tool displays a report describing the outcome, including which, if any, malicious software was detected and removed. The tool creates a log file named mrt.log in the %WINDIR%\debug folder.
Download
Nero 9.2.5.0

Simply Create, Rip, Burn, Copy, Share, Backup, Play, and Enjoy! Nero 9, the easy-to-use yet powerful multimedia suite, gives you the freedom to create, rip, copy, burn, edit, share, and upload online. Whatever you want – music, video, photo, and data – share and enjoy with family and friends anytime, anywhere.
Nero 9 is the next generation of the world’s most trusted integrated digital media and home entertainment software suite.
Megaupload Links:
Click to Download Part1
Click to Download Part2
Click to Download Part3
Click to Download Part4
Royal Windows Vista Business SP1 x86 DVD ISO | 4.3 GB

In normal Vista Business Dreamscenes are not available but enjoy Royal Business with fully activated Dreamscene packs. It will be more comfortable, faster and reliable when compared to other 32-Bit vista Business operating systems.
New hot fixes, updates and the Vista SP1 package are integrated.
* New Windows Sounds
* New Codings and scripts for high performance
* New ORB image
* UAC Disabled
* Enabled AntiSpyware Realtime Protection
* Show extensions for known file types
* Enabled IE Phishing Filter
* New Default Theme
* It supports more than 4 GB RAM
* Extra 3'rd Party themes
http://netfolder.in/folder.php?folder_id=MTU1MDQ
Portable Autorun Virus Remover v2.3 build 0618

Autorun Virus Remover provides protection against any malicious programs trying to attack via USB drive. When a USB device is inserted into your computer, Autorun Virus Remover will automatically scan it, block and delete autorun virus, trojans, and malicious code. Also, it can detect and remove USB virus such as autorun.inf virus in your computer.
Download: (Size: 1,0 MB)
RapidShare
USB Safely Remove 4.0.9.760

USB Safely Remove is a utility for effortless and speedy disconnection of any removable devices. Not only does it save time, but it ensures that all data remains on a device when it is unplugged.
Why do I need USB Safely Remove?
1. Your data will never be lost when using it.
2. A device will never be stopped accidentally, because USB Safely Remove assigns the correct device names. It can also hide any device that will never need to be stopped.
3. It saves time, because a device can be stopped in one click. This avoids the uncertainty of guessing the reason why a device cannot be stopped.
Download
Rapidshare.com
MEPMedia BurnPro 4.1 Portable

MEPMedia BurnPro 4.1 Portable - 3,29 MB
BurnPro is an award-winning audio CD/DVD burning software. You can read about features of the product, view the screen shot, download the fully functional 30-day trial version of Audio Merge Expert and purchase it if you like the program and wish to use it after the evaluation period. BurnPro is a burning application tool to simplify your burning needs. From now on, it's really easy to burn Audio CD, Data CD/DVD's, create Video DVD's (S)Video CD's, create and burn disc images, and more! It gives easy access to all functionality with a simple menu system, so you don't get lost. Just click, add files and burn!
What can you do with BurnPro?
Burn your music!
Create Audio CD's
- Audio CD's can be played on any CD Player
- WAV/MP3/WMA and Ogg Vorbis are supported
Create MP3 CD/DVD
- Can be played directly with CDDVD players with MP3 support
Create WMA CD/DVD
- Can be played directly with CDDVD players with WMA support.
Burn your data!
Backup your precious data like photos, movies and other stuff from your hard disk before it's to late! Within a few clicks you have created a backup on CD or DVD.
BurnPro supports Multi Layer DVD's with a capacity of 8,5 Gb. Not ready to burn your project yet? Just save all project data for later use.
Backing up data couldn't be easier!
Download: (Size: 3,29 MB)
RapidShare
Windows XP Live USB Edition...
55 MB / unpack = 154 MB | English | Bootable from USB |
Windows XP Live USB Edition... Boot Windows XP Straight From Your USB!!!!
-Basically what the title says...
-Windows XP that boots off of your usb drive (256 or higher)
-Readme inside rar
Links (52 Mb)
Windows XP Pro SP3 DECEMBER 2008 (CD/ISO) | RS Link 730MB
Windows XP Pro SP3 DECEMBER 2008 (CD/ISO) | RS Link 730MB
This is Windows XP Professional SP3 which includes all critical updates through November 2008.
It does not requires any cracks or tools to pass the validation.
This is an untouched version of Windows XP Professional SP3
- Extract .rar files to .iso using Winrar
- Proceed to burn this .iso file to a blank CD using PowerISO, UltraISO, Alcohol 120% at medium speed.
-Then You have a Bootable CD.
-Install fresh copy of Windows XP by formatting your hard drive C:.
-Use and enjoy a lifetime genuine Windows XP SP3
CD image include:
- Bootable ISO file
- Unattended setup
- Pre-Activated, so you don't need any WGA Activation Tool.
- CD-KEY (original Volume License Key) is integrated so you don't have to enter anything. SO YOU CAN USE AUTOMATIC UPDATES!
After install you have 25 Updates including IE 7: (Total: 25 updates , 41.1 MB , 10 minutes)
Security Update for Windows XP (KB955069)
Security Update for Windows XP (KB954459)
Windows Malicious Software Removal Tool - November 2008 (KB890830)
Security Update for Windows XP (KB957097)
Security Update for Windows XP (KB958644)
Security Update for Windows XP (KB954211)
Cumulative Security Update for ActiveX Killbits for Windows XP (KB956391)
Security Update for Windows XP (KB956803)
Security Update for Windows XP (KB956841)
Security Update for Windows XP (KB957095)
Cumulative Security Update for Internet Explorer 6 for Windows XP (KB956390)
Windows Genuine Advantage Notification (KB905474)
Security Update for Windows XP (KB938464)
Security Update for Outlook Express for Windows XP (KB951066)
Security Update for Windows XP (KB946648)
Security Update for Windows XP (KB952954)
Security Update for Windows XP (KB950974)
Update for Windows XP (KB951072)
Update for Windows XP (KB952287)
Update for Windows XP (KB951978)
Security Update for Windows XP (KB951698)
Security Update for Windows XP (KB951376)
Security Update for Windows XP (KB950762)
Security Update for Flash Player (KB923789)
Windows Internet Explorer 7 for Windows XP
SATA1 / SATA2 hard drivers works like a charm
Download :
http://anonymz.com/?http://rapidshare.com/files/171373042/Windows_XP_Pro_SP3_DECEMBER_2008_www.softarchive.net.part1.rar.html
http://anonymz.com/?http://rapidshare.com/files/171372779/Windows_XP_Pro_SP3_DECEMBER_2008_www.softarchive.net.part2.rar.html
http://anonymz.com/?http://rapidshare.com/files/171372878/Windows_XP_Pro_SP3_DECEMBER_2008_www.softarchive.net.part3.rar.html
http://anonymz.com/?http://rapidshare.com/files/171371511/Windows_XP_Pro_SP3_DECEMBER_2008_www.softarchive.net.part4.rar.html
Windows XP Professional SP3 - 541,62 MB
This Windows XP SP3 is untouched, needs ser!@l which is included in rar and fully legit.
How to install:
1. Extract RAR files with Winrar.
2. Burn ISO onto CD with software such as Nero, try to burn as slow as possible.
3. Ready to install? Put the disc into your drive and reboot.
3. Get into Bios and set boot from CD
4. Follow install instructions (very easy)
5. Enjoy your XP
Download: (Size: 541,62 MB)
http://rapidshare.com/files/172256774/WinXp3_www.softarchive.net.part1.rar
http://rapidshare.com/files/172256803/WinXp3_www.softarchive.net.part2.rar
http://rapidshare.com/files/172256773/WinXp3_www.softarchive.net.part3.rar
http://rapidshare.com/files/172256835/WinXp3_www.softarchive.net.part4.rar
http://rapidshare.com/files/172256833/WinXp3_www.softarchive.net.part5.rar
http://rapidshare.com/files/172256580/WinXp3_www.softarchive.net.part6.rar
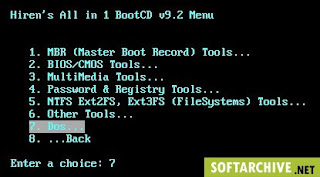
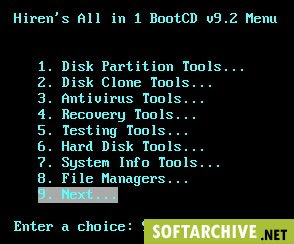
Ghost version of Windows Xp-Vista Style version 3.0 Service Pack 3
Power of the Blue
Support All Motherboard - All HDD Mode (IDE - AHCI)
Ghost
This is the Ghost version of Windows Xp-Vista Style version 3.0 Service Pack 3, This Ghost's included the fresh installed of window. This Ghost verion can be unpack on All Motherboard and All Mode of the Hard disk (IDE Mode - Standard PATA HDD and AHCI Mode - SATA HDD)
Included:
* Hiren's BootCD 9.2 - All in one DOS tools
* A fresh installed of Windows Xp-Vista Style ver 3.0 - Power of the Blue
* Themes for Windows (Over 50 themes)
* RocketDock
* Font Vietnamese
* Unikey4
* Vietkey2000
* Support all motherboard
* Support all HDD mode[/]


[B]How To Use :
1. Download the DVD ISO, burn it into a DVD and restart computer in DOS mode and Setup Windows by Ghost.
http://anonymz.com/?http://rapidshare.com/files/173815638/S3.part01_www.softarchive.net.rar
http://anonymz.com/?http://rapidshare.com/files/173815685/S3.part02_www.softarchive.net.rar
http://anonymz.com/?http://rapidshare.com/files/173815530/S3.part03_www.softarchive.net.rar
http://anonymz.com/?http://rapidshare.com/files/173817308/S3.part04_www.softarchive.net.rar
http://anonymz.com/?http://rapidshare.com/files/173817376/S3.part05_www.softarchive.net.rar
http://anonymz.com/?http://rapidshare.com/files/173817310/S3.part06_www.softarchive.net.rar
http://anonymz.com/?http://rapidshare.com/files/173817307/S3.part07_www.softarchive.net.rar
http://anonymz.com/?http://rapidshare.com/files/173817317/S3.part08_www.softarchive.net.rar
http://anonymz.com/?http://rapidshare.com/files/173820464/S3.part09_20_www.softarchive.net.rar
http://anonymz.com/?http://rapidshare.com/files/173815569/S3.part10_www.softarchive.net.rar
Note: Your must installed on partition C (Partition 1 on Disk 0)
Use this key to reg after installed: DHXQ2 - WRGCD - WGYJY - HHYDH - KKX9B[/b]
list of Linux troubleshooting sites
list of Linux troubleshooting sites for linux newbie or linux pemula (read: indonesian language for newbie), Hopefully these lists will be useful for you and me,surely. Here they are, let's check them out one by one or just skip them if you don't want to. Well Let's get the ball rolling, pal.
1. PC Quest
2. The Linux gurus
3. RedHat
4. Linux Tips
5. Souptonuts
6 Linux Newbie (Pemula)
7. Bruno Linux
8. Linux Newbie Guide
9. Just Linux
10. Unix Guide.net
11. Patoche
12. Pemula Linux.or.id
13. Osdir.com
14. Linux Sorsawo
15. Linux4All
16. Sekolah Linux.com
Incresing a swap space on Linux OS
This is simple method for Increase your available swap space with a swap file
All of your devices function, and everything is configured just the way you like it. At least you think so, until you start running out of memory when you have Open Office.org and lots of browser tabs open simultaneously. You realize you should have specified a larger swap partition during your install. this simple method of installing gain .swap partition.
There’s more than one way to maintain your Linux system. Instead of creating a swap file, you could instead resize and or reshuffle your partitions with parted or its graphical front end QtParted.
To start , see how much swap space you already have. At a command line by typing ,
swapon -s (you might need to prepend /sbin/ if you’re not root)
the command should produce a message :
Filename Type Size Used Priority
/dev/hda2 partition 128044 92472 -1
The numbers under “Size” and “Used” are in kilobytes.
Let’s figure out where to put it. Running df -m from a command line should produce output something like this:
Filesystem 1M-blocks Used Available Use% Mounted on
/dev/hda1 11443 6191 5252 55% /
The -m switch we used provided us with output in megabytes. Under the “Available” column we have approximately 5GB of free space on our root partition. Let’s steal 512MB of that for our auxiliary swap file. You might want more or less, depending on your memory needs, how much swap space you already have available, and how much free disk space you have. The general rule of thumb for swap size is that your total available swap space should be around double your RAM size. If you have additional partitions, and one of those is a better candidate than the / partition, feel free to use it instead.
Please make Back up your important data before proceeding. If you carefully follow the steps below you should be fine,
In order to create our supplementary swap file, we’re going to use the dd (data dump) command. You’ll need to become root to perform the next few steps. su - and enter your root password. When you’re ready,
dd if=/dev/zero of=/extraswap bs=1M count=512
replacing 512 with the number of megabytes you want in your auxiliary swap file. if= and of= are short for infile and outfile. The /dev/zero device file will give us zeroes to be written to the output file. If you want this file on a different partition, say your /var partition, you would replace /extraswap with /var/extraswap.
Now we have a file the size we want on disk, and we can prepare it for use as a swap partition. We’ll use the mkswap command to make our file swap-consumable for the Linux kernel. Again as root,
#mkswap /extraswap
To turn on our swap file, we run swapon /extraswap. Now when we run swapon -s we should see our existing swap partition and our new swapfile. Also, the free command should show an increase in total swap space.
But we’re still not done yet. If we reboot our machine now, our new swapfile won’t be active, and we’ll have to run swapon /extraswap again. to make things more permanent, you need to edit our /etc/fstab file.
make a copy of the file. Something like this should do the trick:
cp /etc/fstab /etc/fstab.mybackup
open /etc/fstab in your favorite text editor and find a line about your swapfile that looks something like this:
/dev/hda2 none swap sw 0 0
You’ll need another line like that underneath it pointing to your new swap file. Replace the first column with the location of your new swap file. For our example, the new line should look like this:
/extraswap none swap sw 0 0
Save the file. Mistaken changes to /etc/fstab could render your system unbootable, so just to make sure you didn’t accidently change anything else in /etc/fstab, run diff /etc/fstab.mybackup /etc/fstab to check for differences. That should output only the single line you added, with a “>” sign in front of it. If you see anything else in diff’s output, edit /etc/fstab again, fix it, and run the above diff command again.
In practical terms, there’s a minimal performance hit from this extra step. By the time you’ve run out of RAM and are beginning to swap, you’re already suffering a massive performance hit. After your original swap partition is full and you’re spilling into your auxiliary swap file, your system should be suffering badly enough that the added performance hit will be completely imperceptible.
In order to avoid this sort of problem entirely with your next install, using Linux’s Logical Volume Manger is probably a good idea, and there are other Linux memory management techniques. Of course the ideal solution is to just install additional RAM.
Creating CD-ROM ISO image in Linux
dd is a perfect tool for copy a file, converting and formatting according to the operands. It can create exact CD-ROM ISO image.
This is useful for making backup as well as for hard drive installations require a working the use of ISO images.
How do I use dd command to create an ISO image?
Put CD into CDROM
Do not mount CD. Verify if cd is mounted or not with mount command:
# mount
If cd was mouted automatically unmout it with umount command:
# umount /dev/cdrom
OR
# umount /mnt/cdrom
Create CD-ROM ISO image with dd command:
# dd if=/dev/cdrom of=/tmp/cdimg1.iso
Where,
* if=/dev/cdrom: Read from /dev/cdrom (raw format)
* of=/tmp/cdimg1.iso: write to FILE cdimg1.iso i.e. create an ISO image
Now you can use cdimg1.iso for hard disk installation or as a backup copy of cd. Please note that dd command is standard UNIX command and you should able to create backup/iso image under any UNIX like operating system.
Towodo Software System Monitor 1.5

System Monitor is designed to monitor Microsoft Windows® computers on a network. It can monitor the usage of CPU, Memory, Disk Drives and Network Adapters. You can set it up to log events and create usage reports to databases located anywhere on your network. By adding rules that will be triggered when certain conditions are met for a specified resource on a computer, you can have notifications sent through email, visually presented or use the Microsoft Text-To-Speech to hear them spoken out loud.
http://rapidshare.com/files/173428128/SYSMONITOR.www.softarchive.net.zip
Recovery for Outlook 2.1

Data recovery software for corrupted Microsoft® Outlook mailboxes!
Recovery for Outlook repairs corrupted Outlook mailboxes (.pst). The program also supports Exchange Offline Storage Files (.ost). Supported Outlook versions:
2007, 2003, 2002, 2000, 98 and 97. The recovered data is saved into a new Outlook mailbox.
http://anonymz.com/?http://rapidshare.com/files/173515768/Recovery.for.Outlook.2.1.incl.patch-SND_www.softarchive.net.rar
System Speedup Wizard 3.1.0

System Speedup Wizard increases computer performance by allocating higher portions of CPU power to active applications and games.It is a revolutionary product which enhances processor intensive software to run at even faster speeds. Very easy to use, fully compliant with all versions of Microsoft ® Windows and compatible with most software. With System Speedup Wizard your computer will run faster than ever before. Boost the performance of your PC the easy way remarkably.
http://anonymz.com/?http://rapidshare.com/files/173587253/System.Speedup.Wizard.3.1.0._www.softarchive.net.rar
Tracks Eraser PRO 7.5

Erase all tracks of your Internet activity!
Google Chrome Support
Mozilla FireFox 3 support
Apple Safari browser support
Windows Vista Support
http://anonymz.com/?http://rapidshare.com/files/173639443/Tracks.Eraser.Pro.v7.5.incl.Keygen-RED_www.softarchive.net.rar


How to remove new folder exe or regsvr exe or autorun inf virus
Manual Process of removal
So let’s start the process off reclaiming the turf that virus took over from us.
- Cut The Supply Line
- Search for autorun.inf file. It is a read only file so you will have to change it to normal by right clicking the file , selecting the properties and un-check the read only option
- Open the file in notepad and delete everything and save the file.
- Now change the file status back to read only mode so that the virus could not get access again.

- Click start->run and type msconfig and click ok
- Go to startup tab look for regsvr and uncheck the option click OK.
- Click on Exit without Restart, cause there are still few things we need to do before we can restart the PC.
- Now go to control panel -> scheduled tasks, and delete the At1 task listed their.
- Open The Gates Of Castle
- Click on start -> run and type gpedit.msc and click Ok.

- If you are Windows XP Home Edition user you might not have gpedit.msc in that case download and install it from Windows XP Home Edition: gpedit.msc and then follow these steps.
- Go to users configuration->Administrative templates->system
- Find “prevent access to registry editing tools” and change the option to disable.

- Once you do this you have registry access back.
- Launch The Attack At Heart Of Castle
- Click on start->run and type regedit and click ok
- Go to edit->find and start the search for regsvr.exe,

- Delete all the occurrence of regsvr.exe; remember to take a backup before deleting. KEEP IN MIND regsvr32.exe is not to be deleted. Delete regsvr.exe occurrences only.
- At one ore two places you will find it after explorer.exe in theses cases only delete the regsvr.exe part and not the whole part. E.g. Shell = “Explorer.exe regsvr.exe” the just delete the regsvr.exe and leave the explorer.exe
- Seek And Destroy the enemy soldiers, no one should be left behind
- Click on start->search->for files and folders.
- Their click all files and folders
- Type “*.exe” as filename to search for
- Click on ‘when was it modified ‘ option and select the specify date option
- Type from date as 1/31/2008 and also type To date as 1/31/2008

- Now hit search and wait for all the exe’s to show up.
- Once search is over select all the exe files and shift+delete the files, caution must be taken so that you don’t delete the legitimate exe file that you have installed on 31st January.
- Also selecting lot of files together might make your computer unresponsive so delete them in small bunches.
- Also find and delete regsvr.exe, svchost .exe( notice an extra space between the svchost and .exe)
- Time For Celebrations
- Now do a cold reboot (ie press the reboot button instead) and you are done.
I hope this information helps you win your own battle against this virus. Soon all antivirus programs will be able to automatically detect and clean this virus. Also i hope Avast finds a way to solve this issues.
As a side note i have found a little back dog( winpatrol ) that used to work perfectly on my old system. It was not their in my new PC, I have installed it again , as I want to stay ahead by forever closing the supply line of these virus. You can download it form Winpatrol website.
PREVENT PEN-DRIVE VIRUSES
Every system has invariably experienced the brunt of the viruses.With devices like Thumb/pen drives becoming popular,viruses are on rage.The more serious ones require good antivirus software and they will be detected and healed.The smaller ones such as orkut virus , sss.exe , ctfmon.exe are not recognized but still pester .Most of the viruses can be avoided as follows
Steps :
1) Goto Run ( Click start , click run )
2) Type gpedit.msc press enter
3) Expand User Configuration option located at your left
4) Click on System
5) Find an option at your right which says TURN OFF AUTOPLAY .Double click it.
6) Enable it and Turn Off Auto Display to All Drives
7) If group edit has already been disabled it means you dont have permission to modify it as you are not the administrator or you have already been affected with a virus .
Best Trick to Make Windows XP Genuine
Change your product key
This will allow you to bypass the Microsoft Genuine Validation Thing WINXP:
This method works better than many others i have tried before. Forget the cracks and injectors etc... this is the BEST WAY:
1) start > run > "regedit" (without the quotes of course)
2) go to the key:
HKEY_LOCAL_MACHINE\SOFTWARE\MICROSOFT\Windows
NT\CurrentVersion\WPAEvents\OOBETimer
...and doubleclick on it. Then change some of the value data to ANYTHING ELSE...delete some, add some letters, I don't care...just change it!
now close out regedit.
3) go to start > run >
"%systemroot%\system32\oobe\msoobe.exe /a"
(again, dont type the quotes)
4) the activation screen will come up, click on register over telephone, then click on CHANGE PRODUCT KEY,
enter any of these keys.
JG28K-H9Q7X-BH6W4-3PDCQ-6XBFJ.
HJY8X-RJDXW-KF7MH-MXDGQ-RG2J8
Q6TD9-9FMQ3-FRVF4-VPF7Y-38JV3
Now you can do all the updates without activating, and the Genuine Microsoft Validation Thing won't bug you no more!!
TURN ON UR PC IN JUST 10 SECONDS
TURN ON UR PC IN JUST 10 SECONDS
u wanna know how to turn the pc on in 10 seconds (may vary)Aight heres what u have to do to turn ur pc on in 10 seconds
Aite Click on the start button then press R it will take u to Run well go to run
n type Regedit
press enter
this will open Registery Editor
now look for the key
HKEY_LOACAL_MECHINE\SYSTEM\CurrentControlSet\Control\ContentIndex
now there find the Key Called
"Startup Delay"
Double Click On It
Now where its Base
Click Decimal
Now its Default Value Is 4800000 (75300:hexadecimal)
Change The Value To 40000
here u go u have done it
now close the Registery Editor and Restart Your Computer
Test UR Anti-virus
To test if your antivirus is in good shape you should do as in continuing:
Open Notepad and copy this text:
X5O!P%@AP[4\PZX54(P^)7CC)7}$EICAR-STANDARD-ANTIVIRUS-TEST-FILE!$H+H*
the text should be in one horizontal line
Then save file as "eicar.com" including quotation-marks
After some seconds saving this file your antivirus should come with the message that this file is infected virus asking permision for its deletetion/clean.
This file is secure and its not gonna infect your computer in whatever way.It is a standart text developed by the European Institute for Computer Anti-virus Research (EICAR).Every antivirus is programed to load this file as a virus.
If your antivirus is not going to hack this file as a virus ,in your screen will appear DOS window with this text EICAR-STANDARD-ANTIVIRUS-TEST-FILE".If this happens then you should probably find some other Antivirus up to date,meaning your PC might
already being infected from viruses and your curent antivirus do not recognize them
Three things that even Microsoft can't explain!
MAGIC #1
An Indian found that nobody can create a FOLDER anywhere on the Computer which can be named as "CON". This is something funny and inexplicable… At Microsoft the whole Team, couldn't answer why this happened!
TRY IT NOW, IT WILL NOT CREATE A "CON" FOLDER
MAGIC #2
For those of you using Windows, do the following:
1.) Open an empty notepad file
2.) Type "Bush hid the facts" (without the quotes)
3.) Save it as whatever you want.
4.) Close it, and re-open it.
Noticed the weird bug? No one can explain!
MAGIC #3
Again this is something funny and can't be explained… At Microsoft the whole Team, including Bill Gates, couldn't answer why this happened!
It was discovered by a Brazilian. Try it out yourself…
Open Microsoft Word and type
=rand (200, 99)
And then press ENTER
And see the magic…..!
To change the product ID Xp/ 2003
To change the product ID
•Log in as the local Administrator
•Click Start > Run > and type in Regedit
•Browse to HKEY_LOCAL_MACHINE\Software\Microsoft\Wi
•In the right pane, right-click OOBETimer, and then click Modify
•Change at least one digit of this value to deactivate Windows
•Click OK and close regedit
•Click Start > Run and type in: "%systemroot%\system32\oobe\msoobe.exe /a"
•Click Yes, I want to telephone a customer service representative to activate Windows, and then click Next
•Click Change Product Key (at the bottom)
•Enter your valid Corporate Product Key
•Press Update and close the window.
•If you are returned to the previous window, click Remind me later
•Restart your computer
Verify the change
•After the workstation restarts, click Start > Run
•Type in: "%systemroot%\system32\oobe\msoobe.exe /a" without the quotes.
•Make sure the dialog box says 'your copy of windows is already activated'
If you performed the above steps incorrectly, or used an invalid key, your system may not be able to boot. Use the F8 key to boot to the last known good configuration and retry with a valid key.
Troubleshooting
If you tried the above steps and nothing happens:
•Make sure you are logged in with the local administrator account, not just an account with Administrator privileges.
•Try replacing the %systemroot% variable with the actual drive letter that your actual directory path, especially when dual booting, or if the system path is on a drive other than C:\
•On a normal Windows XP installation, your systemroot should be C:\windows\ so the command should be C:\Windows\system32\oobe\msoobe.exe /a
•On systems upgraded from Windows NT/2000, the systemroot directory may be C:\Winnt\ so the command should be C:\winnt\system32\oobe\msoobe.exe /a
•Make sure you include a space between .exe and /a in the command:
o Correct - C:\winnt\system32\oobe\msoobe.exe /a
o Incorrect - C:\winnt\system32\oobe\msoobe.exe/a
Add A Photo To MyComputer Properties
STEPS R AS UNDER :
1. Open Notepad
2. Type the following:
[General]
Manufacturer="your_name
[Support Information]
Line1= http://www.blogger.com
Line2= visit http://dhanabalonline.blogspot.com for more info
3. Save as "oeminfo.ini" in the System32 folder.(Without Quote)
4. Create a bmp file(Your Photo) and save it the System32folder as "oemlogo.bmp"(Without Quote).The size of the image should be within 180 (wide) x120 (high) pixels
5. Now Check your My Computer Properties.
It's tested and working
Admin Password Recovery
- Insert Windows CD in your cd-rom and start your computer
- Keep your eye on the screen messages for booting to your cd Typically, it will be “Press any key to boot from cd”
- Once you get in, the first screen will indicate that Setup is inspecting your system and loading files.
- When you get to the Welcome to Setup screen, press ENTER to Setup Windows now
- The Licensing Agreement comes next - Press F8 to accept it.
- The next screen is the Setup screen which gives you the option to do a Repair.It should read something like “If one of the following Windows XP installations is damaged, Setup can try to repair it”Use the up and down arrow keys to select your XP installation (if you only have one, it should already be selected) and press R to begin the Repair process.
- Let the Repair run. Setup will now check your disks and then start copying files which can take several minutes.
- Shortly after the Copying Files stage, you will be required to reboot. (this will happen automatically – you will see a progress bar stating “Your computer will reboot in 15 seconds”
- During the reboot, do not make the mistake of “pressing any key” to boot from the CD again! Setup will resume automatically with the standard billboard screens and you will notice Installing Windows is highlighted.
- Keep your eye on the lower left hand side of the screen and when you see the Installing Devices progress bar, press SHIFT + F10. This is the security hole! A command console will now open up giving you the potential for wide access to your system
- At the prompt, type NUSRMGR.CPL and press Enter. Voila! You have just gained graphical access to your User Accounts in the Control Panel.
- Now simply pick the account you need to change and remove or change your password as you prefer. If you want to log on without having to enter your new password, you can type control userpasswords2 at the the prompt and choose to log on without being asked for password. After you’ve made your changes close the windows, exit.
Creating a Logon Banner
If you want to create a Logon Banner: A message box to appear below your logon on.
- Open RegEdit
- Go To
For Windows 9x and ME -
HKEY_LOCAL_MACHINE\SOFTWARE\ Microsoft\ Windows\
CurrentVersion\ Winlogon
For Windows 2000 XP 2003 Vista -
HKEY_LOCAL_MACHINE\SOFTWARE\ Microsoft\
Windows\ CurrentVersion\ Winlogon - Create a new String value "LegalNoticeCaption "
- Enter the Title of the window. What is displayed in the Title Bar.
- Create a new string value "LegalNoticeText"
- Enter the text for your message box that will appear even before the Logon window.
Track Your Start And Shutdown Computer Time
This small tip helps you to track your start and shutdown time:

- Right click on My Computer > Manager
- In Computer Management window, choose tab System Tools > Event Viewer > System. In the right panel, click on Source column to sort rows by Source and find “eventlog” attributes there.
- First three rows with “eventlog” attribute in source column is the time of start and shutdown your computer: first two rows above are this starting time and the third below is the previous shutdown time.
Morro – A New Free Security software from Microsoft
 Microsoft has announced a plan to provide a free security software for users to compete with McAfee and Symantec.
According to this, Microsoft will stop selling the security software for personal computers and will allow users to download a free software to prevent viruses and spyware.
Microsoft intend to call this new security software Morro and it will appear in the first half of 2009, after Microsoft officially stopped providing Windows Live OneCare service to the users.
According to the statistics, Windows Live OneCare service after two years was only 2% in the security market. This is also a sign of Microsoft going down on this area compared with McAfee and Symantec.
Morro will be free to download and it is mainly for home users.
This is the top ten cell phone October 2008:
1. Nokia E71
2. Nokia E66
3. Samsung SGH-F480
4. iPhone 3G
5. Sony Ericsson C902 Cyber-shot
6. Sony Ericsson W910i Walkman 
7. Nokia 6500 slide
8. Nokia 6300
9. LG Secret KF750
10. Nokia N85
Can Not Login Windows Because Of Missing File System – How To Fix This Problem?
When can not login Windows XP because of corrupted or missing file system, many people have to reinstall Windows. This takes time and the data may be lost.
In fact, you can fix this problem without having to reinstall Windows by following steps:
1. First, you must have a disk to installation CD of Windows and boot your computer from this CD.
2. When the Windows Installation Screen appears to welcome to the windows setup, select the line repair a windows xp installation using recovery console, (or you just press R).
3. When the notice asks you which operating system need to restore, you just choose your operating system or if you have only one operating system, just press 1 then enter.
Note: if your Windows has Administrator account has a password, you have to enter your password and then choose OK to continue.
4. Now you types these command to restore missing system files (just in the yellow box):
| cd system32 | move to the directory System32 where stores Windows XP system files |
| cd config | move to the directory where stores system config files |
| ren system system.old | rename the file system, which stores your current config of your system files, to system.old |
| copy c:\windows\repair\system | copy the original file system from directory Repair to directory System32 to restore the file system |
Then reboot, now you can log in your Windows XP.
Difference between FAT,NTFS & NTFSVersion5
NTFS Version 5 features
Encryption is possible
We can enable Disk Quotas
File compression is possible
Sparse files
Indexing Service
NTFS change journal
In FAT file system we can apply only share level security. File level protection is not possible. In NTFS we can apply both share level as well as file level security
NTFS supports large partition sizes than FAT file systems
NTFS supports long file names than FAT file systems
Difference between 2000 & 2003
Application Server mode is introduced in windows 2003
Possible to configure stub zones in windows 2003 DNS
Volume shadow copy services is introduced
Windows 2003 gives an option to replicate DNS data b/w all DNS servers in forest or All DNS servers in the domain.
Difference between NT & 2000
NT SAM database is a flat database. Where as in windows 2000 active directory is a
hierarchical database.
In Windows NT only PDC is having writable copy of SAM database but the BDC is only read only database. In case of Windows 2000 both DC and ADC is having write copy of the database
Windows NT will not support FAT32 file system. Windows 2000 supports FAT32
Default authentication protocol in NT is NTLM (NT LAN manager). In windows 2000 default authentication protocol is Kerberos V5.
Windows 2000 depends and Integrated with DNS. NT user Netbios names
Active Directory can be backed up easily with System state data
The Difference Between POP3 and IMAP
There are two different protocols available to access e-mail: POP3 and IMAP. POP3 is useful when e-mail is checked from only one computer. IMAP is the better choice when you would like to check your mail from multiple computers, at work and home, for example. IMAP has the added benefit of accessing folders on the server, allowing you to organize your e-mail, and access it from anywhere. If you use Webmail, you should use IMAP on all of your e-mail clients. Use of a POP3 mail client in association with Webmail can cause errors in your inbox that will result in a temporary loss of access to your mail.
POP3 works by reviewing the inbox on the mail server, and downloading the new messages to your computer. Clients can access their inboxes. no other folders on the server can be accessed. POP3 only handles retrieval of messages from a client's inbox. When using POP3, your mail is stored on your PC.
IMAP downloads the headers of the new messages on the server, then retrieves the message you want to read when you click on it. IMAP4 can be used to access multiple mailboxes and mailbox folders, and public folders, as well. When using IMAP, the mail is stored on the mail server. Unless you copy a message to a "Local Folder" the messages are never copied to your PC.
Webmail (a.k.a. Outlook Web Access) uses HTTP/HTTPS to provide Web browser-based access to clients' inboxes, their other mail folders and to public folders.
POP3
You only check e-mail from one computer.
You want to remove your e-mail from the mail server.
IMAP
You check e-mail from multiple locations. at work and home
You use Webmail.
Tips Keep your Inbox small! This will speed up your e-mail retrieval. Checking the e-mail is directly dependent on how many e-mail messages are in your inbox on the mail server.
POP3
Set to remove mail from server after 30 days.
Don't check more frequently than every 15 minutes.
75 MB is the maximum for POP3 users. POP'ing large mail boxes consumes excessive server resources.
IMAP
Do NOT check all folders for new messages! This slows your e-mail substantially.
Use "mail/" ( without the quotes ) as your IMAP folder directory.
You can set your client to download the mail and to remove the mail from the server, like a POP3 client.
Organize your mail into folders, and archive your older messages. This speeds e-mail retrieval by minimizing the number of messages in the inbox.
| POP3 | IMAP |
| Downloads messages to computer and deletes from server. | Downloads only header of the message. It retrieves the message only if you want to read. |
| Only inbox is accessible. No other folder on the server can be accessed. | Cab be used to access multiple mail box and mail box folders. |
| Mail is stored in PC | Mail is stored in server, unless you copy the message to local folder. |
| Choose if You only check e-mail from one computer
|
|
| Choose if You want to remove your e-mail from the mail server | Choose if You use Webmail. |
Difference between Outlook and Outlook Express
Outlook express E-mail client.
Outlook Express is a POP3- and IMAP-compatible mail client with a built-in newsreader. It is available with Internet explorer for Windows (and is the newsreader in outlook ) Outlook Express is designed for home users who gain access to their e-mail messages by dialing in to an Internet service provider. designed for use with Simple Mail Transfer Protocol (SMTP), Post Office Protocol 3 (POP3), and Internet Mail Access Protocol (IMAP). Supports LDAP, MHTML,HTML, S-MIME & NNTP. full support for HTML mail enables you to personalize your messages with custom backgrounds and graphics. Backup file : .dbx
Choose Outlook Express if You require only Internet e-mail and newsgroup functionality
Outlook.
messaging and collaboration client. it is also a personal information manager. perfect client for business users. Complete integration of e-mail, calendaring, and contact management. With Outlook, you can integrate and manage e-mail from multiple e-mail accounts, personal and group calendars, contacts, and tasks. With exchange server, you can use workgroup information sharing workflow communications, group scheduling, public folders, forms, and enhanced Internet connectivity. Outlook is designed for use with the Internet (SMTP, POP3, and IMAP4), Exchange Server, or any other standards-based communication system that supports Messaging Application Programming Interface (MAPI), including voice mail. Supports, LDAP, MHTML, NNTP, MIME, and S/MIME, vCalendar, vCard, iCalendar, and full support for HTML mail. Backup file : .Pst. supports up to 1 gb of data storage.
Choose Outlook if:
You require advanced Internet standards-based e-mail and discussion group functionality.
integrated personal calendars, group scheduling, task, and contact management.
integrated e-mail and calendaring, cross-platform clients for earlier windows.
robust, integrated run-time and design-time collaboration capabilities
Subscribe to:
Posts (Atom)